I created a total of 10 different plants, replicated randomly by some simple scaling, and rotating transformations. In Houdini, I first created some blocks to replace the city model and then I created some random points on the ground. Search through the point cloud and if a building block can be searched within 0.5m of the point, delete the point.
S3.W8
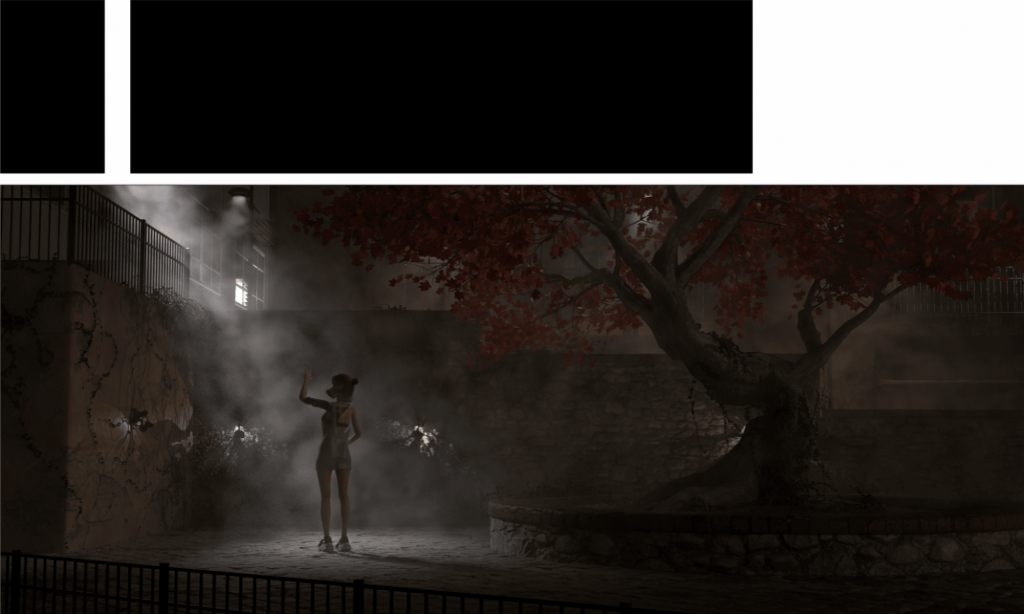
At the beginning of the part 3, I build a simple shape of objects and key a camera animation to fix the whole content of the video.
Then I start to building some building which are close to the camera.
For these closing builidings, I build real 3d models and for other buildings which are far from the camera I’d like to use normal or bump texture to show detail. Based on some codes, I only build some fundation model units to generate different buildings.
Then, I want to choose spesific areas to generate trees through attribute transfer and points cloud. because I don’t want put plants on the road and building, so if the the point too close to these models the program will delete them automaticly.
Then I import some trees from Speedtree. And use stamp to rebuild the size, transform and rotate.
for further work, I will add more different buildings and road detial on the scene to make them look more realistsic.
S3.W7
In week 7, I start a challenge video as part 3 of my personal project. I find a reference video below.
Obviously, The difficult point in part 3 is the huge scene with plants. Besides, I plan to increase details with some Roma buildings. So, there are some Roma style buildings and different trees in part 3. I will build these buildings automatically in Houdini and scatter trees of different shapes.
S3.W6
I have rendered part2 in week 6. Through trying the Houdini rendering pipeline I found that the render layer is easier to control in Houdini than in Maya. In Houdini, I can directly set force rendering objects and cancel rendering certain models or only keep the matte of some object in one render pannel. In Maya, if I want to separate the rendering layer I have to create different collections and add different objects or lights, in a word, it is not easy to use the render layer in Maya.
S3.W5
This week, I am starting part 2 of my personal project which focus on camera animation, lighting and material in Houdini. Normally, I am more familiar with the UI of Maya, however, I am learning FX in Houdini. It’s a terrible workflow to make the same material in two software and transfer file between Maya and Houdini frequently. For trying everything in Houdini, I have started to make the part 2 animation.
In the process of part 2, I split the environment fog. In my old workflow, I always render models and fog together. Although that way can save some processing time, it cost more time on rendering for denoising.
Once I separate them, I can control the quality of images independently. The cons are that I have to set different render layers, but the method will reduce rendering time.
S3.W4
This week I am trying to render all content. It costs too much time to render but lucky, I got satisfying images.
S3.W3
The week 3 I finished the clothes model in MD and then unfold UV in the Maya. Because the substance painter pipe flow is not convenient, I give up to use the substance painter to paint textures. I have imported models into the SP several times, and there are always some errors such as can not show models well, can not separate UV correct or can not bake ID textures and so on. I directly use Arnold nodes to come true the realistic clothes.
The tie example
Then I start to build an animation system through the advanced skeleton and paint the skin weight.
I can not find a reference video from websites, so I take a short myself as the animation reference.
After finishing the character animation draft, I start to make the fx part in Houdini.
Then I also need a bird animation, but I really do not want cost too much time building a bird model so I directly buy a cheap model from the Artstation. I only need to key the animation and make a cycle animation in Houdini which saves much time.
The Final draft camera like below:
The last thing I make in Week 2 is to test the face skin weight and the result like below:
S3.W1/2
This term I am going to produce some small scenes with a high degree of finish. In the first scene is that a disabled girl gradually disappears and becomes birds to fly away. I don’t find a similar scene on the web, however, it is like some particle disappear fx. For the Animation part, I have recorded a video by myself which is only around 3 seconds. I have rebuilt and fixed my old model about the girl like below:
I built a new hair for the girl and then
I fixed some problems with the displacement textures in PS and repainted textures with makeup.
I continued to improve more detail in the scene including some tubes, and wood windows. The most difficult part is lighting, I want to make the room lighter and don’t want to make windows too light. The balance is hard to control because I want to show too much detail and at the same time I also want to keep space.
So now, I am going to make textures for clothes and rig it again. In week 2, I will also finish the animation of the girl and birds.